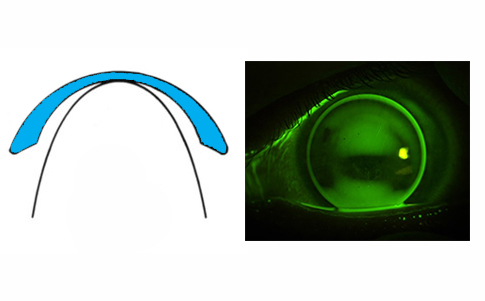
When fitting Keratoconus avoid any mechanical pressure on the diseased area (cone), no rubbing should occur and a healthy tear layer to supply nutrients and flush away metabolites is your first priority. This is done by spreading the bearing area to the periphery- aiming for a 3-point feather touch.
Alignment Fit #
The main objective is to provide the best possible visual acuity, with a final fit that creates minimal interference to the corneal physiology. It is vital that the cornea continues to function well, without disturbing the epithelium. Ideally the ‘three-point-touch’ is used to distribute the weight of the contact lens as evenly as possible between the cone and the peripheral cornea.2

Flat Fit #
A flat fit, results in apical bearing leading to corneal staining and possible scarring.1 Flat fit corneal staining is a very specific swirl pattern, described in corneal staining.
Steep Fit #
A steep fit, results in excessive apical clearance possibly leading to peripheral seal off.1

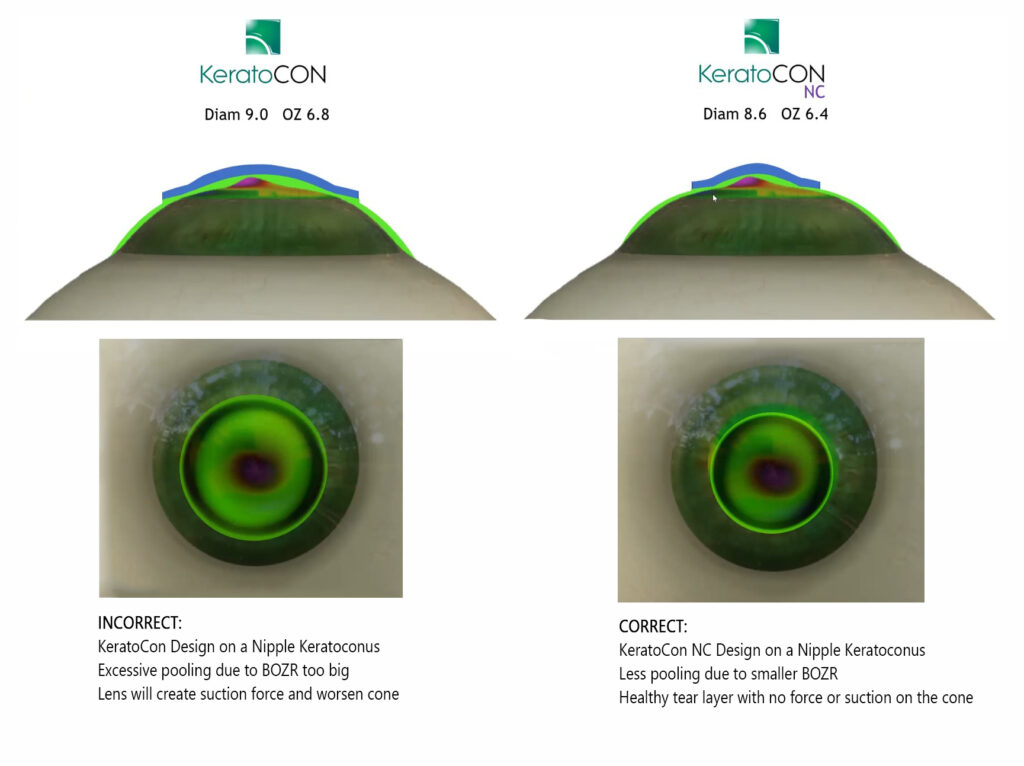
KeratoCon vs KeratoCon NC #
It is very important to fit the right design and the right BOZD on the right cone. If the BOZD is too big around the cone, it leads to excessive mid peripheral pooling, creating suction on the cone. Suction will allow the already progressive disease to progress even faster.